Sunday, October 31, 2010
Gone Batty!
I just love Tiddly Inks digital stamps - they are so stinkin' cute! This little doll is called, Batty. She's colored with copics and her buttons and hair clip are tiny rhinestones (Recollections). I cut out her bat balloon, covered it in UTEE and then glittered it with chunky black glitter. The card is a pre-cut DCWV card. The sentiment is a rub-on from a $1 pack from AC Moore.
Vintage Halloween
This little beauty comes from Third Coast Art Rubber Stamps. Her name is Kitty & Cat (find her here). She's colored with copics and embellished with lavender Stickles. Her pumpkin was colored then coated with Glossy Accents. I mounted the image on Bazzill Bling cardstock (Spoiled Brat) and cut with SB oval nesties; I used lavendar (not sure of the actual color name) Bazzill Bling cardstock cut with SB scalloped oval nestie. The crepe paper embellishment was actually white party streamers I had around the house. I colored it with my Bic Mark Its and then accordian-folded it and then, using double-sided tape, affixed it to the back of the oval. The "Oct. 31st" is a sticker from a $1 pack from AC Moore and I attached the black and orange ribbon. Finally, I embossed a square of the Bazzill cardstock (same used for the oval) with a Quickutz embossing folder and affixed everything to a Bazzill A2 card!
Hildegard
In my quest to find a scary witch for my sister's card, I came across Hildegard here at Third Coast Art Rubber Stamps. She looks scary enough...until I read the sentiment that came with her! So Mom I thought you would get a kick out of ol' Hildy :)
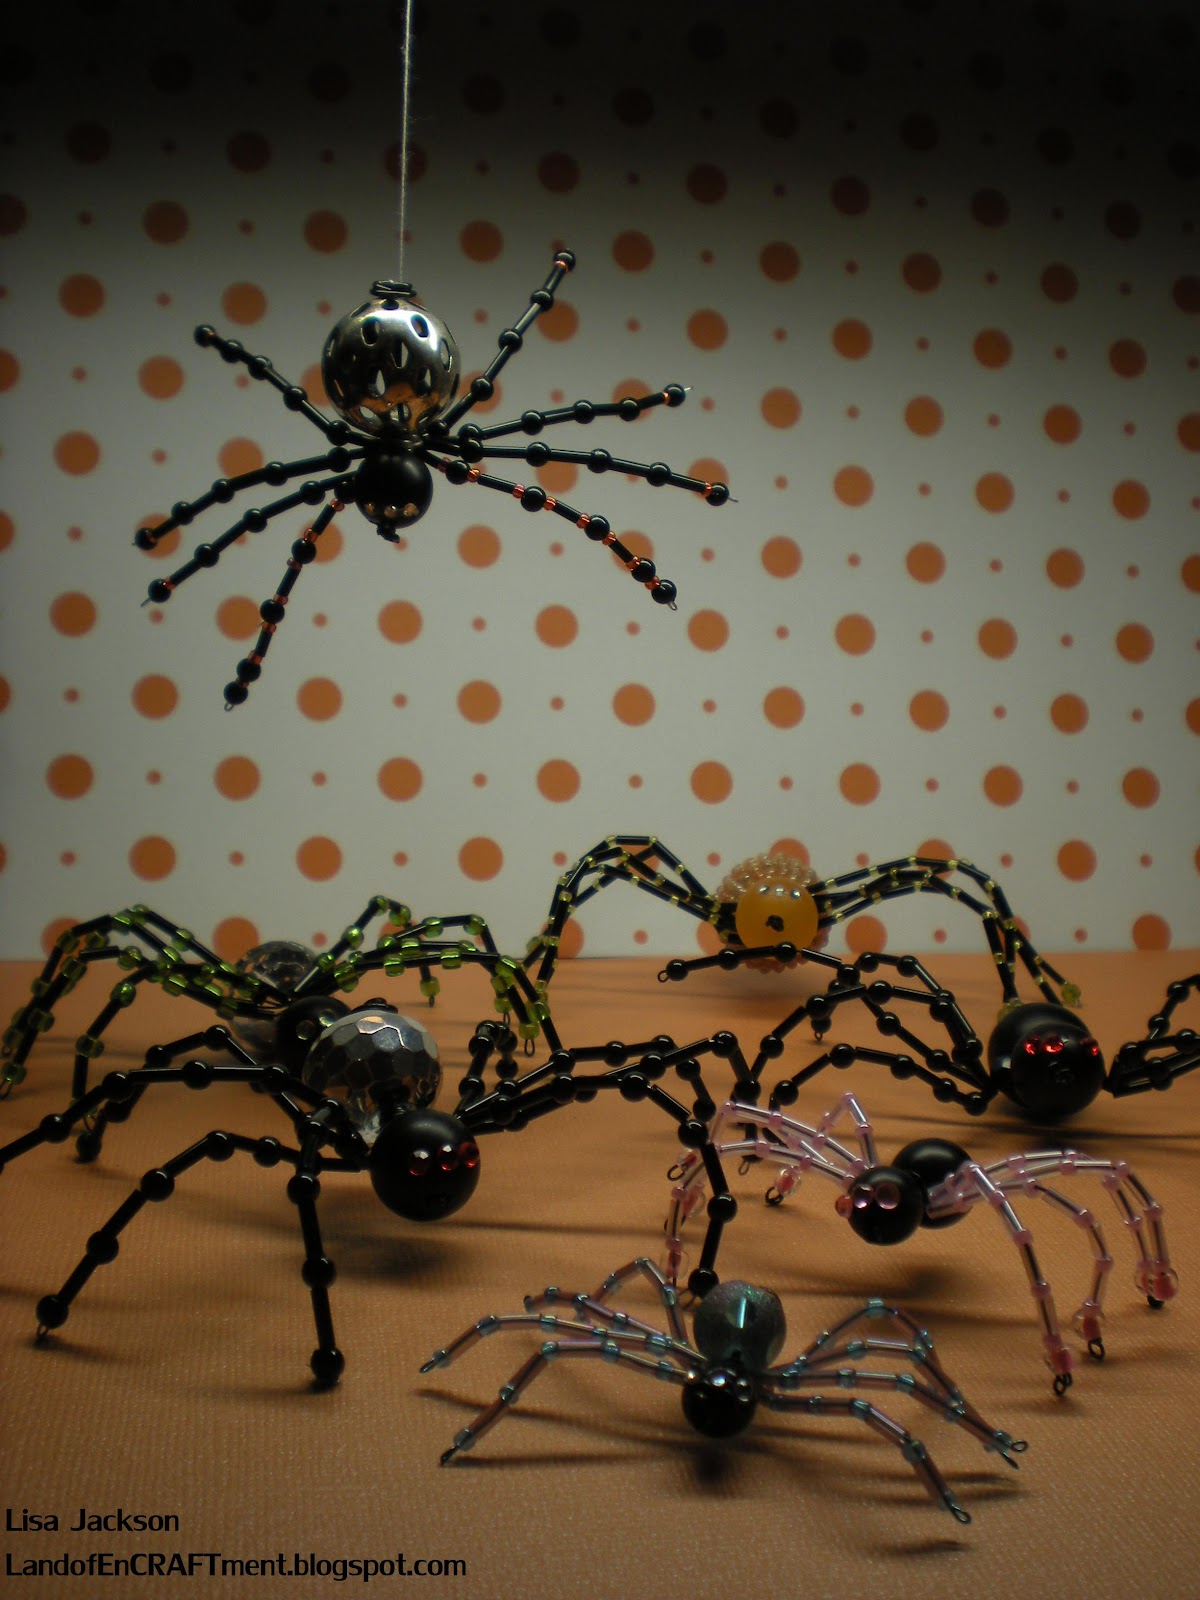
Arachnophobia!
Happy Halloween Everyone!
I don't like spiders. I can handle mice and snakes - well not if they were in my house - but I don't like to see even pictures of creepy crawly spiders! So it's funny to me that I would enjoy making these little beaded beauties! I found instructions for them in the Better Homes & Gardens Special Publication Halloween 2010. They were pretty easy and I had a lot of fun choosing different beads for their bodies and legs. I put my own twist on them by varying the sizes and the bead combinations, along with putting the rhinestones eyes on each!
They are going to hang in my doorway tonight to surprise unexpected Trick-or-Treaters. Hmmmm, maybe that's how my phobia of spiders started!?
I don't like spiders. I can handle mice and snakes - well not if they were in my house - but I don't like to see even pictures of creepy crawly spiders! So it's funny to me that I would enjoy making these little beaded beauties! I found instructions for them in the Better Homes & Gardens Special Publication Halloween 2010. They were pretty easy and I had a lot of fun choosing different beads for their bodies and legs. I put my own twist on them by varying the sizes and the bead combinations, along with putting the rhinestones eyes on each!
They are going to hang in my doorway tonight to surprise unexpected Trick-or-Treaters. Hmmmm, maybe that's how my phobia of spiders started!?
Saturday, October 30, 2010
Hellish High Heels
I am not sure I've posted more than one post in a day before but I'm a few posts behind and Halloween is 4 short hours away! It's been such a busy month - I can't believe it's over tomorrow :(
I couldn't resist making a pair of paper Halloween high heels using the template by Carlos N. Molina. I made a couple modifications by making it a closed-toe shoe and the addition of the spider web strap. Once I saw the cobweb on the October 31st Cricut cartridge, I knew I wanted it on my shoes; the same with the spider embellishments (brads by Creative Imaginations). I sure wish I could get these in a Women's size 7 :)
A Wicked Witch for Shelly
My sister has been asking me to make a card with a scary witch instead of the cards I've been making with the cutie witches. I didn't think I could find a scary witch...and then I stumbled upon the Etsy shop of Rick St. Dennis. The image is called, "THAT-A-WAY Witch" and I knew the moment I saw her, this was Shell's witch! There are some really wonderful images at Rick's Etsy shop (I bought the SeaSprites also!) and I am in *love* with this witch! She's colored with copics and embellished here and there with glaze pens. The potion bottles got a thick coat of glossy accents after I colored their contents with glaze markers. The image is cut out with SB Nestabilities big scalloped squares (large). I colored the background with a C3 copic marker and edged the picture with gun metal Stickles. The metal brads are by Creative Imaginations (the style is Fright Night #21787) and the sentiment is from a $1 pack of Halloween stickers from AC Moore. The card is Bazzill cardstock and the gorgeous flocked damask background (cut with SB mega nestie curved rectangles) is The Paper Studio (brocade flocked - black, item #982033). (I don't have any info for the orange striped paper.)
So there you have it Shell; I hope you like her as much as I do. I had a good time coloring her up. She reminded me of the one Halloween when you came to visit and we dressed like witches :) Sure wish you were here THIS Halloween! Love you <3
Tuesday, October 26, 2010
Front Porch Decorations
I was perusing my copy of the Better Homes and Gardens special interest publication HALLOWEEN 2010 magazine and came across a 4-page spread of really neat Halloween displays by Debbie Dusenberg (I found her blog!!! Curious Sofa Diaries). One of the displays she created for Halloween uses a pair of bendable mannequin legs, clad in orange and black striped tights with witch shoes, and planted in an urn. It looked so freaky and cool; I knew I had the decoration for my front porch! As it turns out, bendable mannequin legs are unbelievably expensive so I had to go with the more realistic price and little
less realistic-looking legs. So, I went with inflatable legs ($15/pr), tights (child size - $2.50/pr), witch shoe covers ($5/pr and I had one pair) over black socks, and the "dress" is a black trash bag. I had the witch hats but they were from the Target $1 bins. I added the polka dot ribbon (Hobby Lobby -40% off). My door sign came from WalMart ($10) but it was a must - those polka dots! And the hanger - so stinkin' cute! I will add our carved pumpkins to the porch and a life-size talking witch for the bay window on Halloween night. I am going to fill "BOo" bags now and watch the Rocky Horror GLEE episode - it just doesn't get any better than this :) Have I mentioned I love Halloween? ;)
Subscribe to:
Posts (Atom)